Mom’s Lemon Cake

photo(52)

I’m excited to be joining another Fiesta Friday!  If you’re not sure what I’m talking about, Fiesta Friday is The Novice’s Gardener’s weekly blog party and you should definitely join! Check out the info the guidelines here.

Well, every party needs a cake right!? So that’s what I’m bringing this week! This is my mom’s lemon cake recipe that I altered just a tiny bit. She usually puts a delicious lemon glaze on it, but I’ve been good about going to the gym and eating fairly healthy this week so I decided to just dust it with some powdered sugar instead (I know it’s not really healthier but it helps me feel less guilty). She also usually doubles the ingredients shown below and bakes it as a bundt cake but again, I’m trying to make it a little bit lighter. This cake looks deceivingly simple and plain, but it is incredibly moist while still being light, fluffy and feels super soft in your mouth. This cake also fills your kitchen with the smell of fresh lemons and if you close your eyes and take a deep breath you can almost pretend it’s finally Spring.

Mom’s Lemon Cake
1/2 cup butter, softened
1/4 cup shortening
1 1/2 cups sugar
3 eggs
1/4 cup fresh squeezed lemon juice
1 tablespoon grated lemon peel
1 1/2 cups all-purpose flour
1/2 teaspoon salt
1/4 teaspoon baking powder
1/4 cup milk
1/4 cup powdered sugar

1. Preheat oven to 350 degree and grease a round cake pan or spring-form pan.

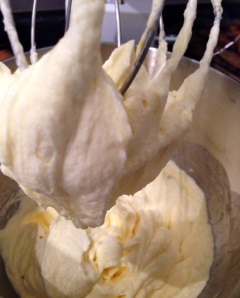
2. Cream the butter, sugar and shortening in a large bowl. Next add the eggs one at a time, mixing well after each one. Then add your lemon juice and lemon peel.

photo(48)

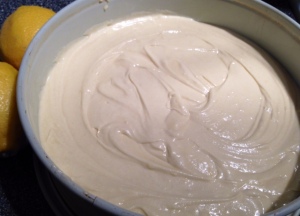
3. In another bowl combine the flour, salt and baking powder. Add half of the dry ingredients to the bowl with the wet ingredients and combine. Then add half your milk and combine again. Finally add the remainder of the dry ingredients and the remainder of the milk and mix well.
photo(50)

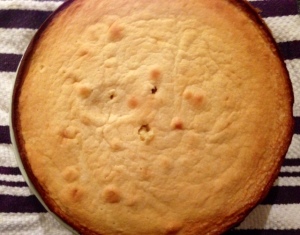
4. Pour the batter into your prepared pan and cook at 350 for 30-35 minutes, until you can insert a toothpick in the middle of the cake and it comes out clean.

photo(51)

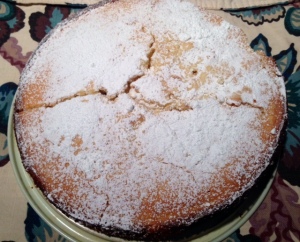
5. When the cake has cooled sift the powdered sugar over the top, enjoy!

photo(53)

Breakfast Bites

photo(46)

I have to admit, these aren’t the prettiest little things but they came about out of necessity. I usually start my mornings with a large coffee and a yogurt. Unfortunately, the past couple months I haven’t been feeling great after eating my morning yogurt. I’m not sure if I’ve developed some type of lactose intolerance (is that possible?) or what, but I’ve decided I need to switch out my yogurt for something else at least a few days a week.

While trying to figure out what else would be a good morning snack, I rummaged my cupboards for healthy ingredients. I also knew I would need a little bit of sweetness in this to make it just as appealing as my delicious creamy yogurts, hence the chocolate chips. These little breakfast bites only take a few minutes to make and you can add whatever you like into them. If you don’t have wheatgerm, feel free to leave that out. Add some dried fruit or try another kind of nut if you want.

Breakfast Bites
1/2 cup almonds
2 teaspoons water
1/4 cup oats
1/2 cup creamy peanut butter
2 teaspoons wheat germ
2 Tablespoons chocolate chips
2 Tablespoons honey
pinch of cinnamon

1. Place the almonds in a food processor and pulse them a couple times, then add the water and continue pulsing them until you get a sticky mixture. It should be a little soft but still have tiny bits of almonds in it.

photo(44)

2.  Add the almond mixture and the rest of the ingredients to a small bowl and mix to combine.

photo(45)

3. Roll the mixture into bite-sized balls and store in the fridge until you’re ready to eat them, enjoy!

photo(47)

Italian Wedding Soup

soup4

This recipe was a lesson in using what I had around to create something I really wanted. For the past week or so I’ve been craving a nice hot bowl of Italian wedding soup, so I finally just made it myself. The problem was, I didn’t exactly have the right ingredients. So, I made some substitutes. Instead of ground beef, I used turkey for the meatballs. Instead of escarole, I had swiss chard. And for the pasta, all I had was small shells.

While this isn’t exactly traditional Italian wedding soup, I’m all about changing recipes up to make them my own, so I really enjoyed this little experiment. Not to mention, it tastes pretty close to the original!

Italian Wedding Soup soup3
Meatballs:
2 Tablespoons olive oil
1 lb ground turkey
1/8 cup chopped fresh parsley
2 gloves garlic, minced
1/2 onion, finely chopped
1/4 cup breadcrumbs
1 egg
1 Tablespoon milk
1 teaspoon salt
1/2 teaspoon pepper

Soup:
32oz chicken or vegetable stock
1/2 onion, chopped
1 bunch of swiss chard
1/2 box small pasta (I used small shells)
2 Tablespoons olive oil

1. Start by making your meatballs. Combine all of the ingredients except the olive oil in a bowl and mix to combine, careful not to over mix it. Use a teaspoon to scoop out small bits of the meat mixture and form small meatballs. Put the olive oil in a pan on medium heat and add the meatballs to the pan. Cook for about 6 minutes, turn them upside down and cook for another 5-6 minutes, they should be lightly browned.

soup

soup2

2. While the meatballs are cooking get started on your soup. Chop up the swiss chard into bite-sized peices, using the entire green part and about 1/2 of the stems. Add the olive oil to a pot and set it to medium-low heat. Add the chard and your chopped onion to the pot. Season with salt and pepper. Cook the chard and onion about 5 minutes. Next add your stock.

3. When your meatballs have finished cooking add them into the pan with the chard, onion and stock. Finally, bring the soup to a boil and add the pasta, cooking about for 10 minutes until the pasta is al dente.

4. Top with some pecorino romano and enjoy!
soup5

Related: Fiesta Friday

Sweet and Spicy Beets

photo(43)

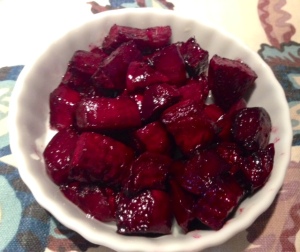
I feel like beets are a vegetable that don’t get the attention they deserve. I only recently started cooking with whole beets and they are delicious! Not only do they taste great, but their color is so beautiful, they can make a really pretty side dish.  Also, besides their great looks and taste, they’re very good for you.

Beets can be prepared very simply. This recipe highlights their sweetness while adding just a little kick from the chili herb vinegar. The vinegar I used here was one I received in my oh so great farm basket a few weeks ago. If you don’t happen to have chili herb vinegar in your kitchen (which I’m assuming most people don’t) you can get a similar effect by adding just a little bit of siracha or any hot sauce to apple cider vinegar – basically you just want some tang and some spice. These are great on their own as a side dish, or as a topping for a salad or flat bread.

Note: This recipe only makes enough for 2 people (or 1 very hungry person!) so you’ll want to double or triple if you’ve got a crowd.

Sweet and Spicy Beets
3-4 whole beets
2 Tablespoons extra virgin olive oil
1 Tablespoon brown sugar
1 Tablespoon chili herb vinegar
1/2 teaspoon salt
1/4 teaspoon fresh ground black pepper

1. Preheat oven to 400 degrees.

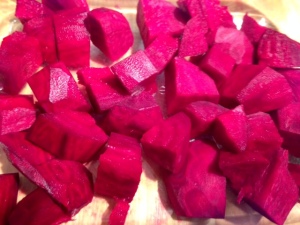
2. Wash your beets and peel them using a potato peeler. Then cut each one into 1 inch sized chunks – I find it’s easiest to cut the beet in half, then cut each half into small pieces.

photo(40)

3. In a small bowl add your olive oil, brown sugar, vinegar, salt and pepper and whisk to combine.

4. Toss your beets in the mixture and pour the entire bowl evenly over a baking sheet.

photo(41)

5. Bake at 400 for about 40-45 minutes, until you can easily stick a fork in the beets, enjoy!
photo(42)

Tabbouleh

photo(39)

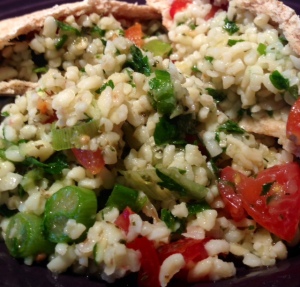
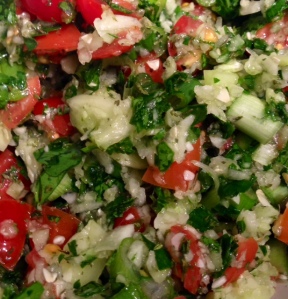
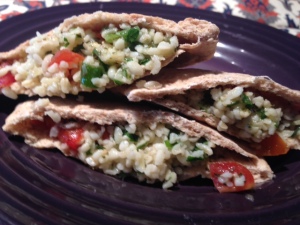
I love making dishes that I can make a big batch of and bring to lunch every day for a week. This helps prevent me from going out and buying lunch. It also gives me a lunch I can look forward to – not just some sad sandwich that I don’t really want to eat. Tabbouleh is an excellent example of this, this recipe makes enough for nearly a week’s worth of lunches and paired with a nice warm pita it’s a lunch you’re sure to look forward to!

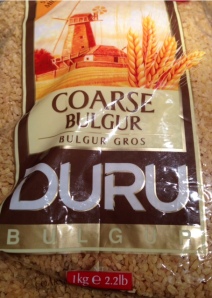
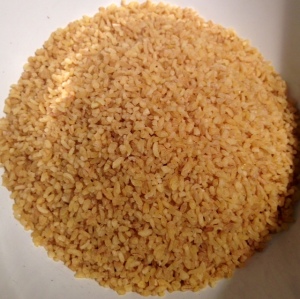
If you haven’t used bulgur before it’s a type of wheat that’s common in Middle Eastern cooking. You can find it in most grocery stores near the rice or the international aisle. Unlike other grains, you cook it by pouring boiling water over the wheat and letting it sit and absorb.photo(33)

This recipe is very light and fresh while still being filling. I definitely suggest making some pitas to go with it. This King Arthur recipe works every time! You can also substitute some of the flour for whole wheat if you like.

Tabbouleh
1 cup bulgur wheat
2 cups boiling water
1 pint cherry tomatoes, each cut into quarters
1/2 cup chopped fresh parsley
1/4 cup dried mint
6 green onions, chopped
1 cucumber, chopped (optional)
1/4 cup extra virgin olive oil
1/4 cup fresh squeezed lemon juice
1 1/2 teaspoon salt
1 teaspoon fresh ground black pepper

1. Place your bulgur in a heatproof bowl, boil your water and add the boiling water to the bowl with the bulgur. Cover the bowl with aluminum foil and let it sit for about 30 minutes, until the water has evaporated and the bulgur is softened. Fluff the bulgur lightly with a fork.

photo(34)

2. While waiting for your bulgur, chop your tomatoes, parsley, cucumber and onions and add them to a separate bowl. Next add the mint. Once the bulgur has cooled, add the chopped vegetables and mint to it and stir to combine.

photo(35)

3. Finally, make the dressing. Combine the olive oil, lemon juice, salt and pepper in a small bowl. Pour the dressing over the bulgur mixture and stir it thoroughly to combine.

photo(37)

4. Chill for at least an hour before serving, enjoy!
Roasted Stuffed Tomatoes

tomato2

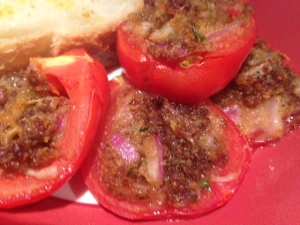
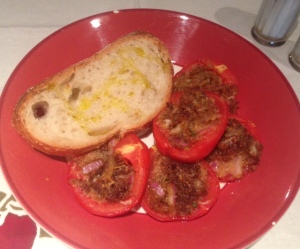
These roasted tomatoes are a very quick and easy appetizer or snack. They’re the perfect combination of the soft roasted tomato, slightly crunchy baked breadcrumbs and melted mozzarella – you pretty much can’t go wrong!

These were also a great way for me to incorporate an awesome lemon bergamot balsamic vinegar I bought and can not get enough of. My mom and I discovered an olive oil and balsamic tasting room in Alexandria, VA that any foodie in the DC area should check out! Olio has tons of different oils and vinegars for you to try out – flavors I never would have even thought of. I ended up purchasing the lemon bergamot because it has a nice citrus note to it. I’ve been looking for more and more ways to incorporate this balsamic into my dishes (so let me know if you have any suggestions)!

tomato4tomato8

Roasted Stuffed Tomatoes
6 Roma tomatoes
3 Tablespoons olive oil
1/2 small red onion finely chopped
1/4 cup Italian seasoned breadcrumbs
1/4 cup shredded mozzarella cheese
1 teaspoon balsamic vinegar
1/4 teaspoon salt

1. Preheat oven to 375 degrees. Cut each tomato in half lengthwise and scoop out the center. Place the hallowed out halves on a paper towel to draw out some of their moisture.

2. While the tomatoes are drying prepare the filling by combining the remaining ingredients in a small bowl.

tomato7

3. Place your tomato halves on a baking sheet covered with parchment paper. Carefully spoon the filling into each tomato.

tomato6

tomato5

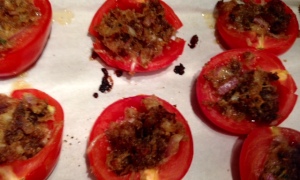
4. Bake for about 15 minutes, until the filling starts to look crisp and golden, enjoy!
tomato3

tomato

Eclairs

photo (3)
Sundays during football season have pretty much become my official “spend the day in the kitchen trying something new” days. I only have the patience for one football a week, tops, so instead I amuse myself by cooking and baking while everyone else is busy paying attention to the games. A few weeks ago I was browsing through possibilities of things to make that Sunday and asked my husband how he felt about eclairs. Given that he doesn’t really care for sweets (something I’ve never understood) I wasn’t expecting more than an unenthusiastic “eh” as his answer. However, “ECLAIRS ARE MY FAVORITE DESSERT” he immediately shouted back! I have no idea how I didn’t know this already, but that was all the justification I need to spend the day making them.

Although this might look like a fairly complicated recipe, each part isn’t too difficult, it can just take a bit of time to make each component and put them together. Even so, they’re totally worth it and you’ll be glad you spent the time to make them!

Eclairs
Pate a choux (the dough):
1/2 cup milk
1/2 cup water
6 Tablespoons of butter, cubed
1 Tablespoon sugar
1 cup flour
4 egg yolks

Filling:
3/4 cup sugar
1/4 cup plus 2 teaspoons cornstarch
1/8 teaspoon salt
3 egg yolks, beaten
3 cups milk
1 1/2 tablespoons butter
1 1/2 teaspoons vanilla extract

Chocolate Ganache:
1 cup semi-sweet chocolate
3/4 cup heavy cream
2 Tablespoons butter

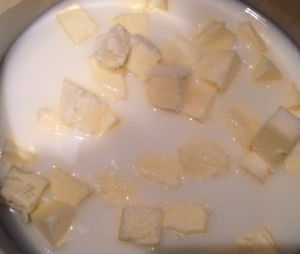
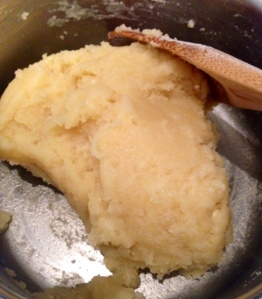
Preheat oven to 400 degrees. First make the Pate a choux. Combine the water, milk, butter and sugar in a saucepan and bring to a boil. Once it starts to boil, turn off the heat and dump in the entire cup of flour all at once. Using a wooden spoon stir in the flour until it forms a ball of dough. Remove the dough and place it in the bowl of a stand mixer (if you have one) or a a mixing bowl. Let the dough cool off. Once it has cooled add the egg yolks on at a time, mixing after each one you add. This should get you a pretty runny dough. Prepare a baking sheet with parchment paper, then put the dough mixture in a pastry bag and pipe the dough into 3-4 inch logs. Bake the dough for about 30 minutes, until it begins to brown.

photo (4)

photo (5)

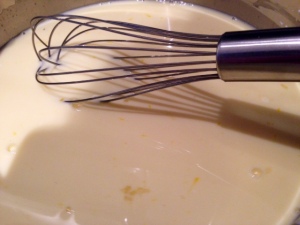
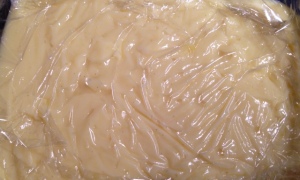
Next, make the filling. Whisk the sugar, cornstarch and salt together in a saucepan. In another bowl, whisk together the egg yolks and milk. On medium heat, slowly add the egg and milk mixture to the saucepan. Whisk the mixture constantly until it reaches a bowl and begins to thicken. Let it boil for just one minute then remove from heat, add butter and vanilla and mix to combine until the butter melts. Pour the filling into a bowl and cover with plastic wrap to avoid it from forming a “skin.” Let it cool on the counter for at least 30 minutes, then refrigerate until cold.

photo (6)

photo (7)

After your filling has cooled, begin to put everything together. Cut each log of dough lengthwise but don’t cut through the entire log, just about 3/4 of the way through. Use a small spoon to fill the opening in the log with the filling.

photo (8)

photo (9)

photo (10)

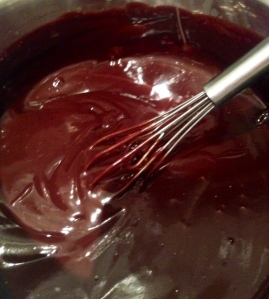
Finally, make your ganache. Heat the heavy cream over low-medium heat. Slowly add the chocolate in thirds, stirring constantly. Once all the chocolate has been added continue to stir until it’s melted and smooth. Remove from the heat and stir in the butter.
photo (11)

Complete your eclairs by dipping each one in the ganache. Refrigerate for at least an hour before serving, enjoy!

photo (12)