Arancini

photo (60)

These arancini have quickly become a holiday favorite with my family. While we don’t do the full blown out Italian seven fishes dinner, we do avoid meat on Christmas Eve and make at least a couple of fish dishes. My mom introduced these rice balls to our vegetarian Christmas Eve menu a few years ago and they were an instant success.

This year I took on the arancini duty and am happy to have this recipe under my belt now.  While I usually shy away from things that need to be fried, these are totally worth the effort (and I usually make my husband do the frying part for me)!

Arancini
2 cups uncooked rice
1 container of small fresh mozzarella balls, cut in half
2 cups breadcrumbs
6 eggs, lightly beaten
1 cup grated parmesan or pecorino romano cheese
1/4 cup fresh basil, finely chopped
vegetable oil for frying

Note: I’ve found that it’s easier to make this recipe in thirds (as described below) to get the right texture for your rice mixture.

1. Cook the rice according to the instructions on the package and let it cool completely once cooked.

2. Place 1/2 cup of the breadcrumbs in a small bowl.

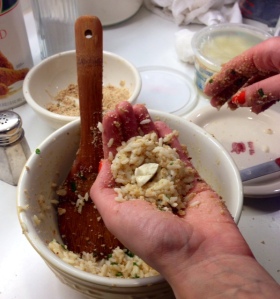
3. When the rice has cooled, add 1/3 of the cooked rice, 1/2 cup of breadcrumb, 2 lightly beaten eggs, 1/3 cup of grated cheese and 1/3 of the chopped basil in a bowl and stir to combine. The mixture should be just a little sticky, so you can easily roll it into a ball. If it’s too sticky, add a bit more rice.

photo (64)

4. Take a small amount of the rice mixture and form it into a ball. Make a small indent in the middle of the ball and place half of one of the small mozzarella balls in it, cover it with a bit more of the rice mixture and roll into a ball.

photo (65)

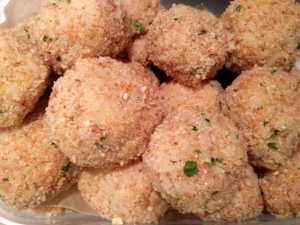
5. Roll each ball in the bowl of breadcrumbs and then set aside.

photo (63)

6. Continue the same process until all of your rice is used up.

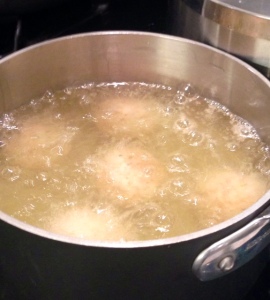
7. Heat about 3 inches of vegetable oil in saucepan on medium heat to 350 degrees. When the oil has reached 350 degrees carefully fry the arancini in small batches for about 4 minutes each, until brown.

photo (62)

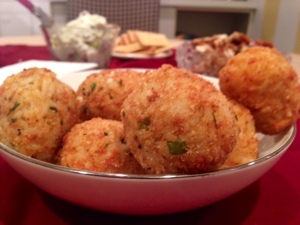
8. Place each arancini on a paper towel to drain and serve warm. These pair great with some marinara sauce, enjoy!
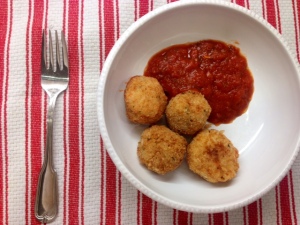
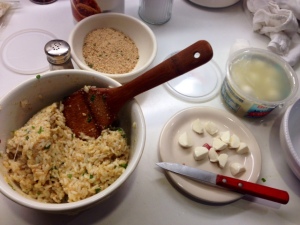
photo (61)

Chocolate Almond Truffles

photo (58)

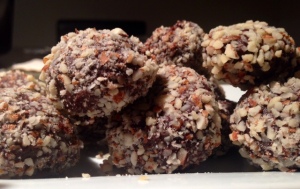
So I’m definitely really into the chocolate and almond combo this year (as if you couldn’t tell already) and keep trying to find new ways to combine them. I always thought of truffles as such a decadent luxurious treat, and couldn’t believe how simple they were to make when I read this Food Network Magazine article on them last year. The article made truffles seem so feasible and simple I had to give it a try. I used a slightly different method to melt the chocolate than they suggested, but the truffles came out so great you’d think they were from a fancy chocolatier! Also, it’s such an easy recipe to switch up with different flavors, Food Network gives some great suggestions. I decided I had to share this with all of you and encourage you to try your own truffles! They make very impressive holiday gifts – if you can keep from eating them all yourself!

Chocolate Almond Truffles adapted from Food Network Magazine
12 ounces semi-sweet chocolate
1 cup heavy cream
1 Tablespoon butter
pinch of salt
1 teaspoon almond extract
1 cup chopped almonds

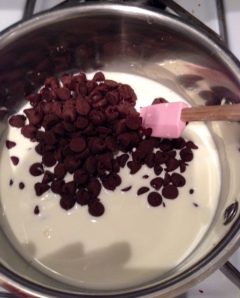
1. Add the heavy cream, salt and butter to a saucepan on low heat.

2. Begin to slowly add your chocolate, about 2 ounces at a time, stirring constantly. This part takes a bit of patience but the end result is totally worth it!
photo (56)

3. When all the chocolate has melted stir in your almond extract.

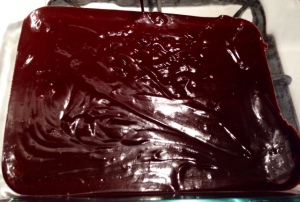
4. Pour the mixture into a shallow baking dish and refrigerate for a few hours until firm.

photo (57)

5. Once the mixture is firm, scoop out small spoonfuls (I found an ice-cream scoop worked really well for this) and roll into balls. If the mixture gets too soft while you’re doing this you might need to pop it in the fridge again for 20-30 minutes and then finish.

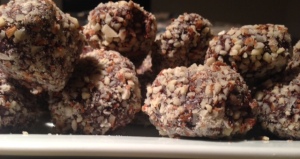
6. Roll each ball in the chopped almonds, enjoy!

photo (59)

Bite-Size Lemon and Cranberry Sandwich Cookies

photo(30)

One thing I do love about being in the DC area is the way people react to snow.  Having grown up in Upstate New York, it took a pretty decent storm to get a snowday.  I’m used to people fearlessly driving on slushy roads and taking to their shovels without a second thought.  Down here, pretty much just the *chance* of snow is enough to close down most offices.  I’m delighted that today’s snow predication did come true.  Although it’s not too much, it’s just enough to beautifully coat the ground and warrant a work from home day.

I decided to take the extra time at home to work on some more holiday baking.  I quickly whipped up this cookie dough before a 9am meeting and finished baking and frosting them during lunch.  These cookies are inspired by this recipe that mom often makes.  There are always so many great baked goods around at the holidays it’s easy to go overboard.  So, I decided to make these little bite-size sandwich cookies (although since they’re sandwich cookies I guess 2 small ones kiiind of equals one big one, but we’ll just ignore that)!

Bite-Size Lemon and Cranberry Sandwich Cookies
Dough:
1 cup room temperature butter
1 cup 10x sugar
2 1/4 cup flour
1/2 teaspoon salt
zest of 1 lemon
1/2 cup dried cranberries

Frosting:
1/2 cup butter
2 cups 10x sugar
juice of 1 lemon

1. Begin by making your dough, combine the butter and the sugar and mix well with a hand mixer, whisk or stand mixer. Add the rest of the ingredients and combine well, the dough should feel slightly soft and buttery.

2. Let the dough chill for about 30 minutes. While it’s chilling make your frosting. First, add the butter and the lemon juice. Then add your sugar. Depending on how juicey your lemon is you might need to add more sugar. Continue adding sugar and mixing until you have a frosting like consistency.

photo(29)

3. Roll out your dough about 1/4 inch think and use a small cookie cutter to cut out the circles. Bake at 350 for about 6-8 minutes.

4. Let the cookies cool after baking them. When cooled, add a small amount of the frosting on the flat side of one cookie and top it with another, enjoy!

photo(28)

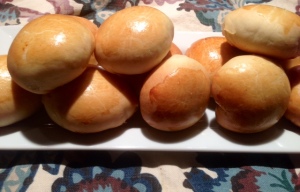
Feta and Olive Stuffed Dough Balls

photo (48)
So I wasn’t really sure what to call these.  They’re inspired by a Turkish dish called pogaca, which are basically delicious little dough balls stuffed with feta and parsley.  I happen to have a lot of olives around and wanted to incorporate those so I added them to the filling.  Then, I decided I wanted a touch of spice so I added Turkish pepper paste.  The pepper paste is difficult to find in American grocery stores but you could mix some cayenne or red pepper into tomato paste and get a similar product.

I just love the dough that these call for, it’s absolutely beautiful and always comes out great.  If you have a phobia of making dough (like I did for a long time) this is a great one to try to boost your dough making confidence.  These can make a great appetizer, but they’re hard to stop eating so for me they usually end up being a meal on their own!

Feta and Olive Stuffed Dough Balls
Dough:
photo (49)4 cups of flour
1 cup of milk
1 1/2 Tablespoon yeast
1/2 cup melted butter
1/2 Tablespoon sugar
1 teaspoon salt

Filling:
3/4 cup pepper paste (see above for substitute)
1/2 cup pitted olives
1/2 cup crumbled feta cheese
1 small onion, chopped
1 Tablespoon dried parsley
1/2 Tablespoon dried mint
1 teaspoon dried oregano
1 Tablespoon olive oil
1/2 teaspoon salt
1/2 teaspoon ground black pepper

Egg Wash:
1 large egg, whisked

1. Combine the yeast and 1/2 cup of the milk in the bowl of a stand mixer and let stand for about 10 minutes.

2. Combine the rest of the dry ingredients for the dough and add them to your mixer. Combine using the dough hook. Next add the melted butter. Then, add the rest of the milk slowly.

3. Continue to mix using the dough hook for about 5 minutes, you should have a slightly sticky dough at this point.

4. Transfer the dough to a bowl, cover with a clean towel and let rise for at least an hour.

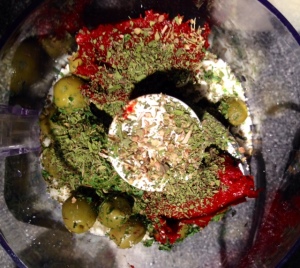
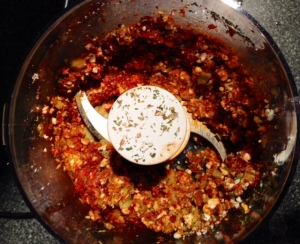
5. While your dough is rising, make your filling. The easiest way is to combine all of the ingredients in a food processor and pulse until they become a spread like mixture. If you don’t have a food processor you can also chop the olives and onion and just stir everything else in.

photo (51)

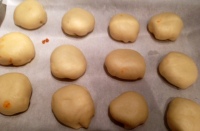
6. Once the dough has risen, roll it out in small batches using a rolling pin until it’s about 1/8 inch thin. Use a circular cookie cutter (or the top of a glass) to cut out circles that are about 2 inches in diameter. Place the circles on a baking sheet.

photo (52) photo (53)

7. Fill the middle of each circle with a small amount of the filling. Then bunch up the ends together to hold the filling. Place the “bunched” side down on the baking sheet. Brush each dough ball with the egg wash and bake at 350 for about 25-30 minutes, until they start to brown. Enjoy!

photo (55)

Squash Fritters

photo(26)

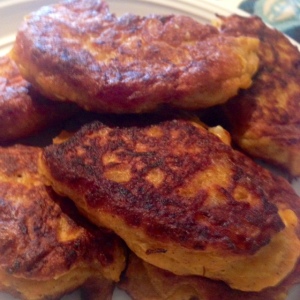
I hope everyone had a great Thanksgiving! It was great to have a chance to go home and spend some time with my family. These fritters are inspired by a dish my Uncle made for Thanksgiving dinner. He mentioned that he had a bunch of leftover squash from his CSA basket and needed to come up with a way to use them up. I’ve been in a similar situation with a variety of squash taking over my valuable counter space so I decided I’d try to make something similar.

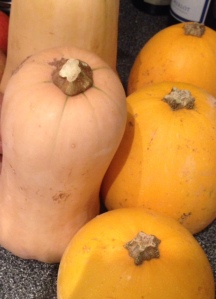
I combined a butternut and a spaghetti squash for these but you could use pretty much any variety you have hanging around. Frying them in a pan gives them a nice crispy exterior and keeps the inside pretty soft. I also toss them in the oven for a few minutes after taking them out of the pan to help them crisp up even more. This will make about 30-40 fritters, but they’re sure to go fast! photo(22)

Squash Fritters
2 squash of any variety
2 large eggs
1 onion, finely chopped
1-2 cups flour
olive oil
salt
pepper
cinnamon
nutmeg

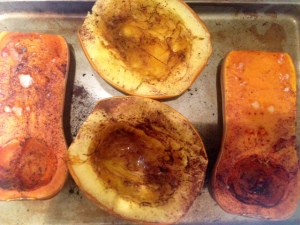
1. Cut your squash in half and scoop out the seeds. Drizzle with olive oil, salt, pepper and cinnamon. Roast the squash at 375 for about an hour – until they’re soft.

2. Remove your roasted squash from the oven and let them cool a bit. Once cooled, begin to scoop out the insides and add them to a large bowl (be careful not to get the skins).

photo(23)

3. Mash up the squash mixture with a fork or a potato masher. Season with salt, pepper, cinnamon and nutmeg to taste.

4. Add your eggs to the squash and combine well. Then, begin adding your flour 1/2 cup at a time until you reach a sticky consistency.

5. Heat up your oil in a frying pan on medium heat, use enough oil to coat to the bottom of the pan.

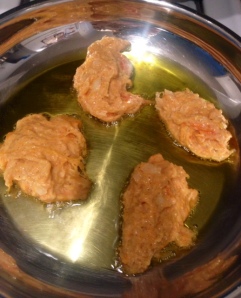
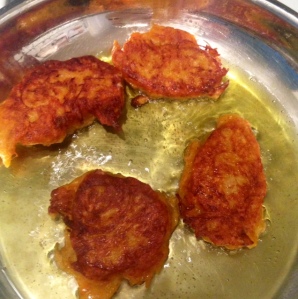
6. Once your oil is hot, carefully scoop a dollop of the squash mixture into the oil – it should sizzle when added. If it doesn’t sizzle, let the oil get hotter before adding your next fritter. Fry the fritters 3-4 at a time, careful to not overcrowd the pan. You will probably need to change your oil a few times in order to cook the whole batch.

photo(24)

7. Cook fritters for 3-4 minutes on each side. Then place them on a baking sheet and put them in the oven at 350 for another ten minutes. Enjoy!

photo(25)